Mapping
Prerequisite: Log In
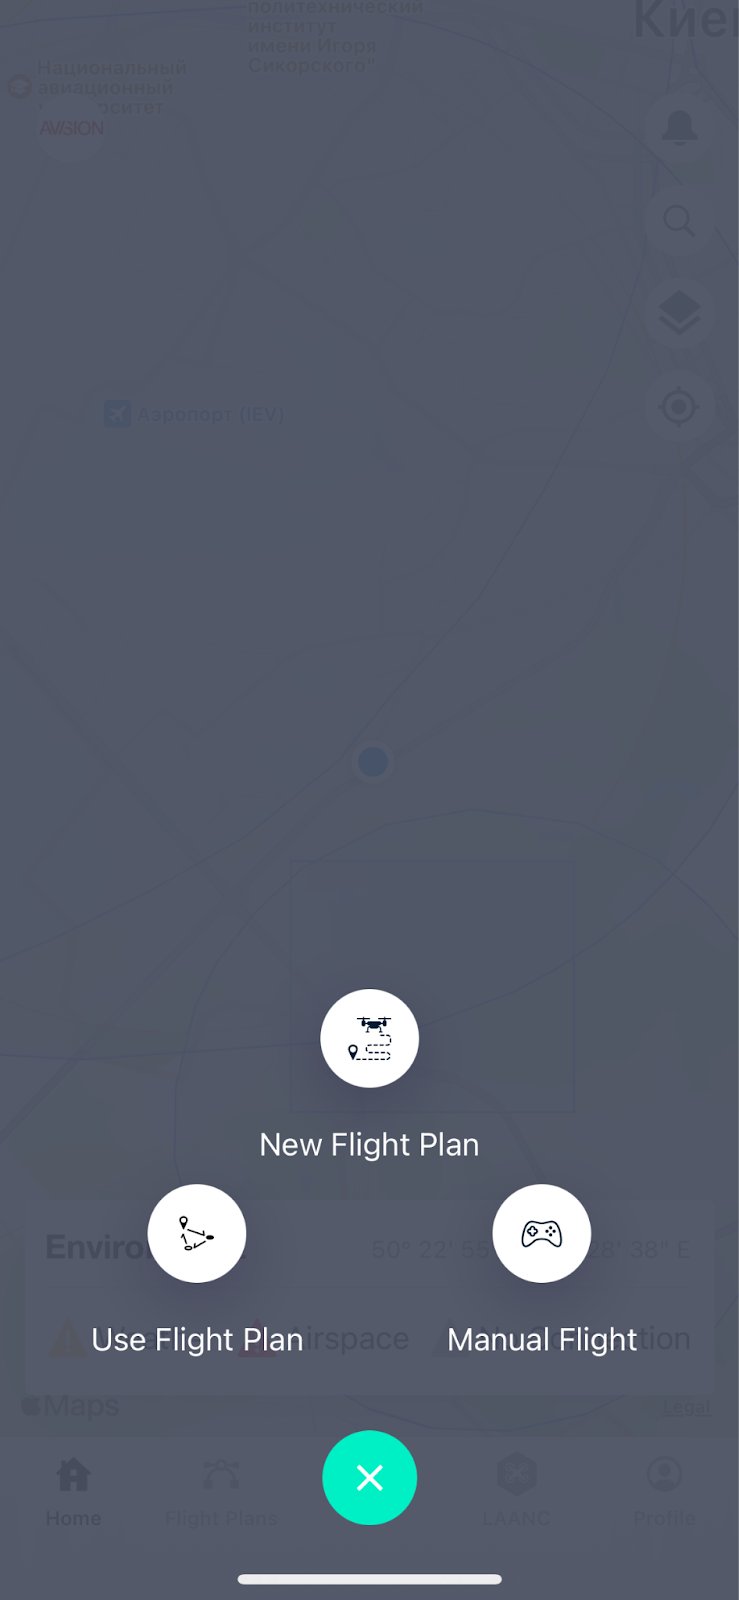
- Mobile Application Home Screen displays current location, no-fly zones, Environment widget, and other important airspace information.
- Click “+” and select the “New Flight Plan” option to create a mapping mission.
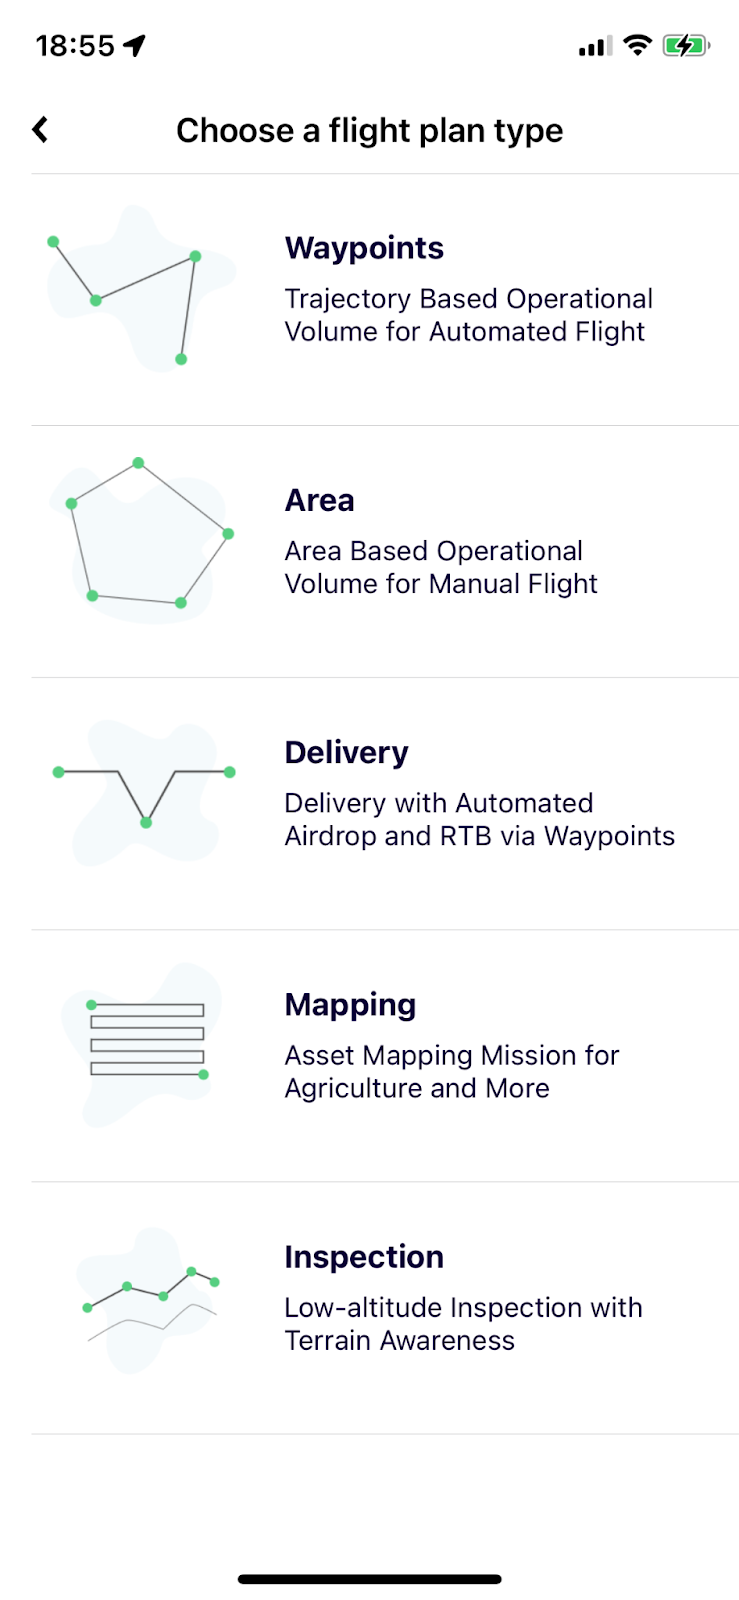
- Select “Mapping” or “Inspection” type of mission (depending on the use-case).
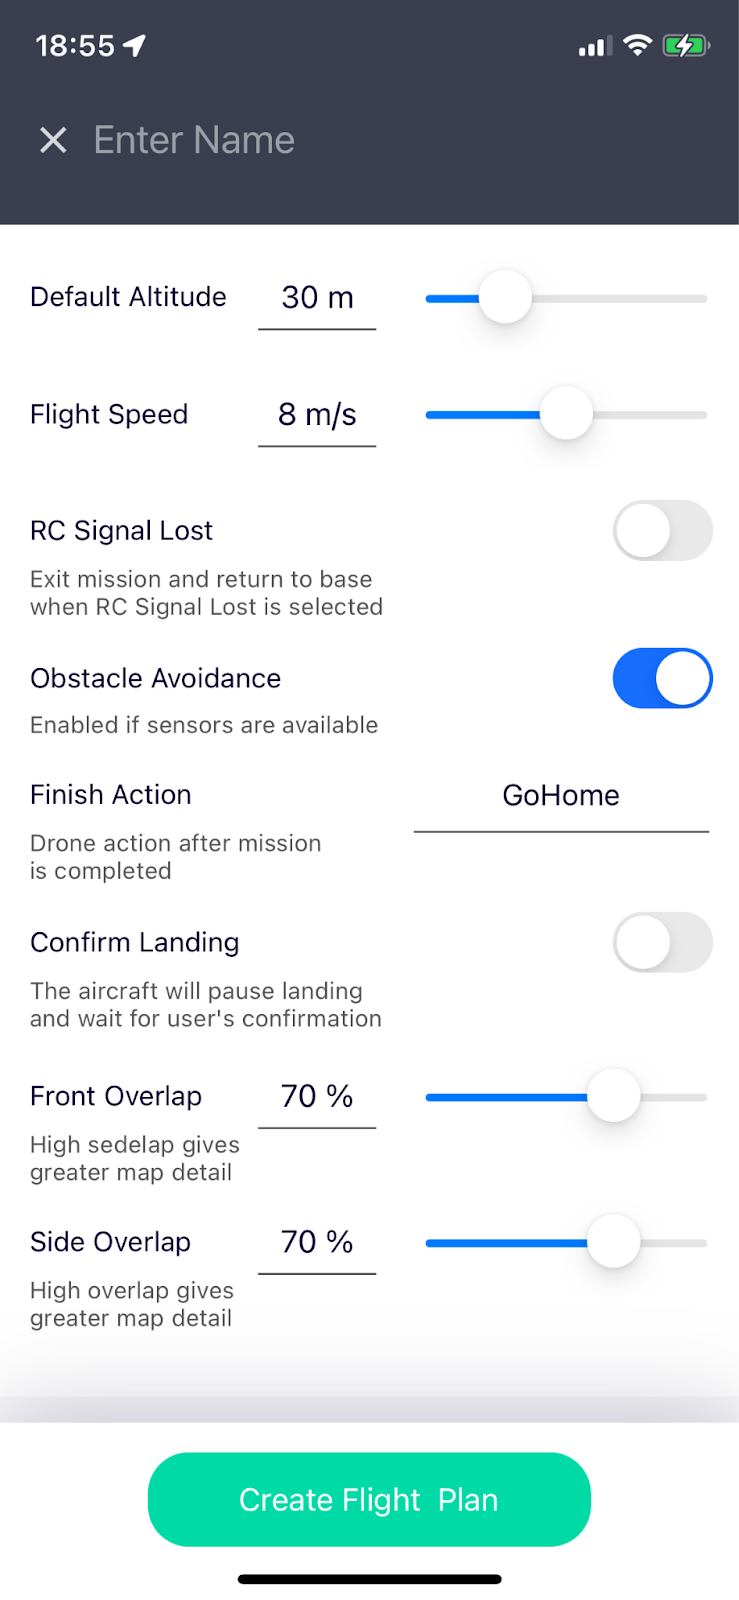
- Enter Name for the Flight Plan, verify default settings, and click the “Create Flight Plan” button.
Mapping type of mission -
Inspection type of mission
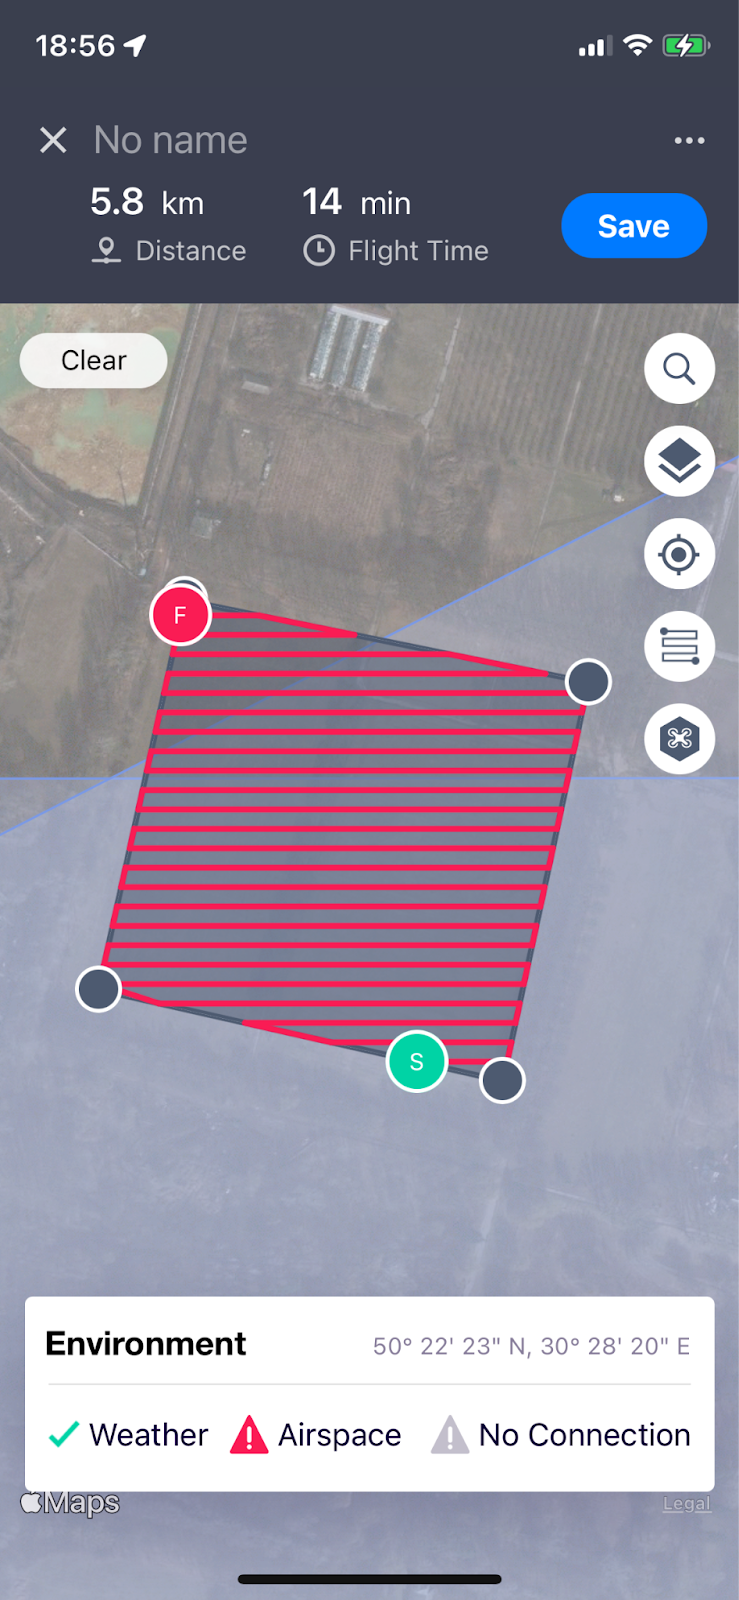
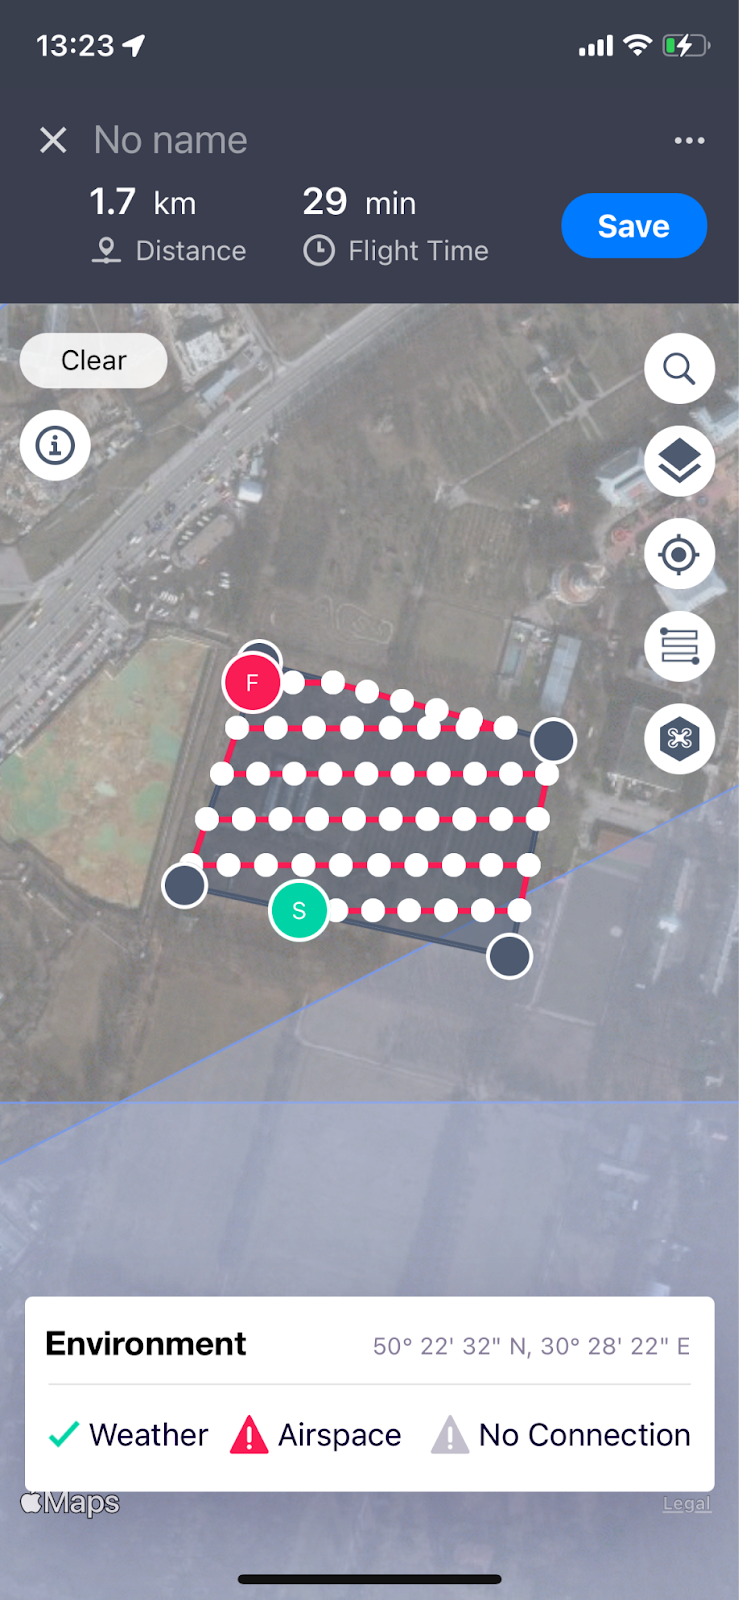
- Tap and hold to add waypoints as boundaries for the new Area of Operation that will be used to calculate the grid for mapping missions.
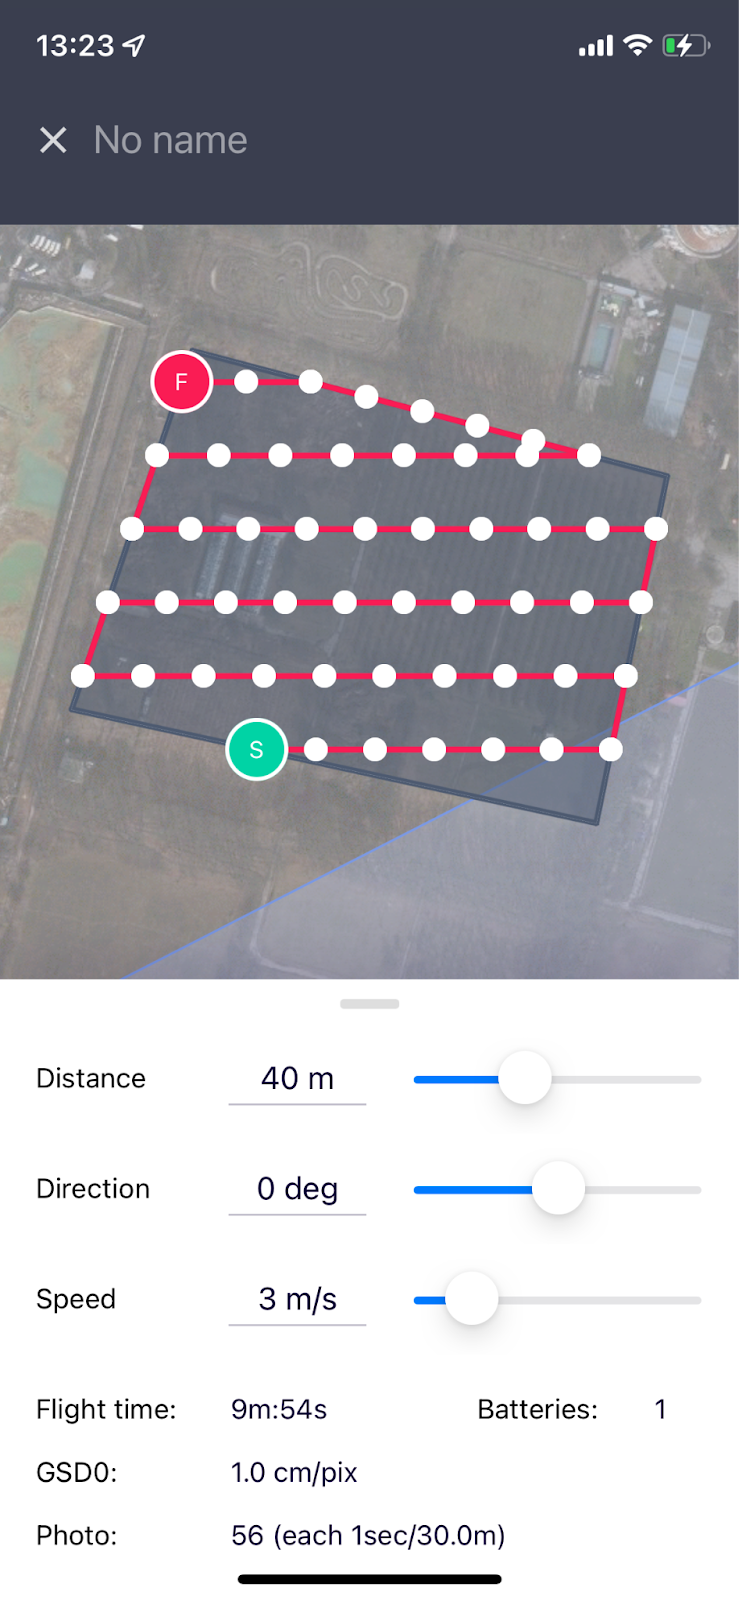
- Tap on the “Grid” button to review or customize grid details if needed and click “Save” to apply the changes.
Mapping type of mission -
Inspection type of mission
- Grid details
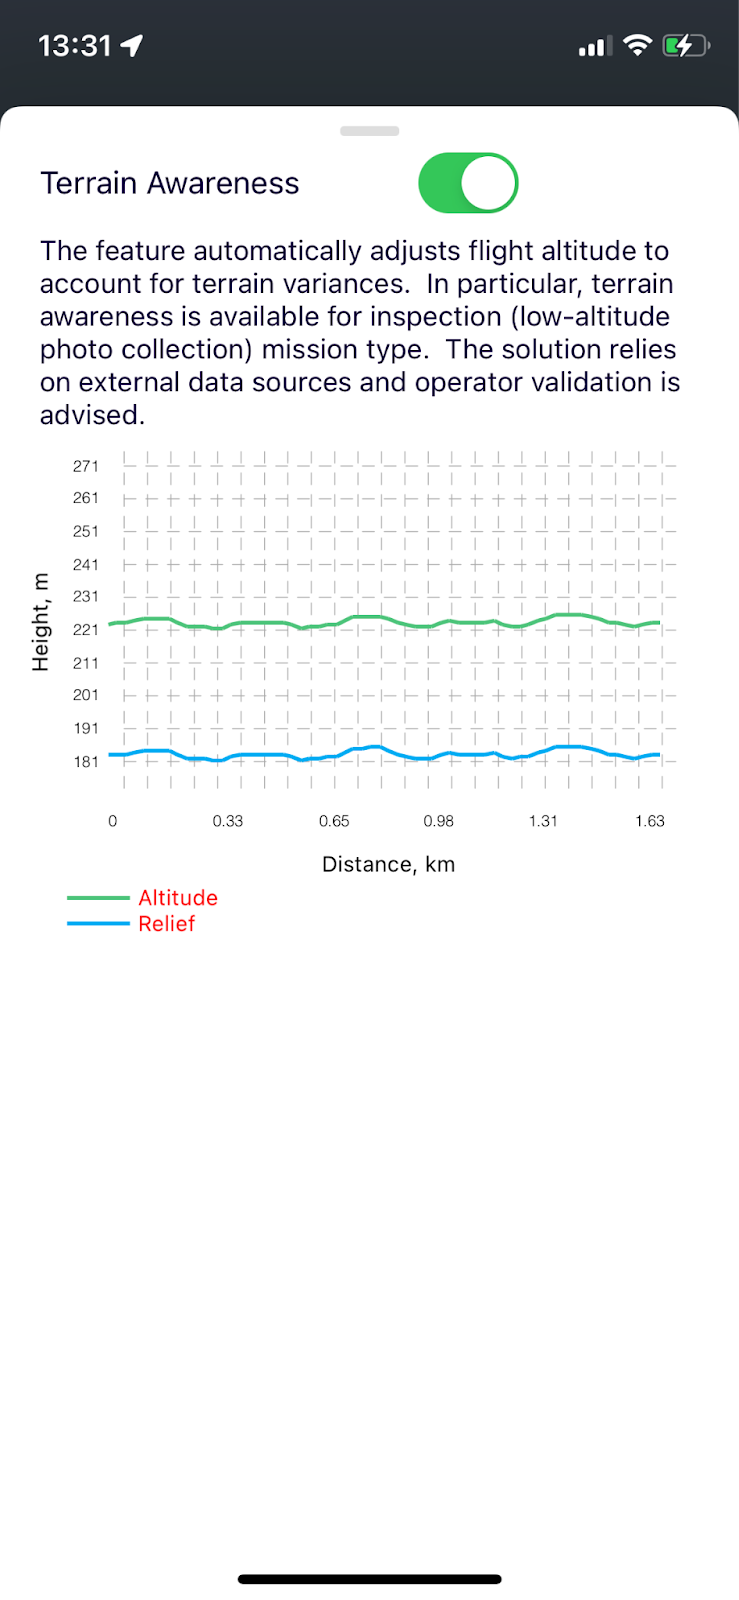
- Tap on the “Info” button to review the terrain awareness indicator
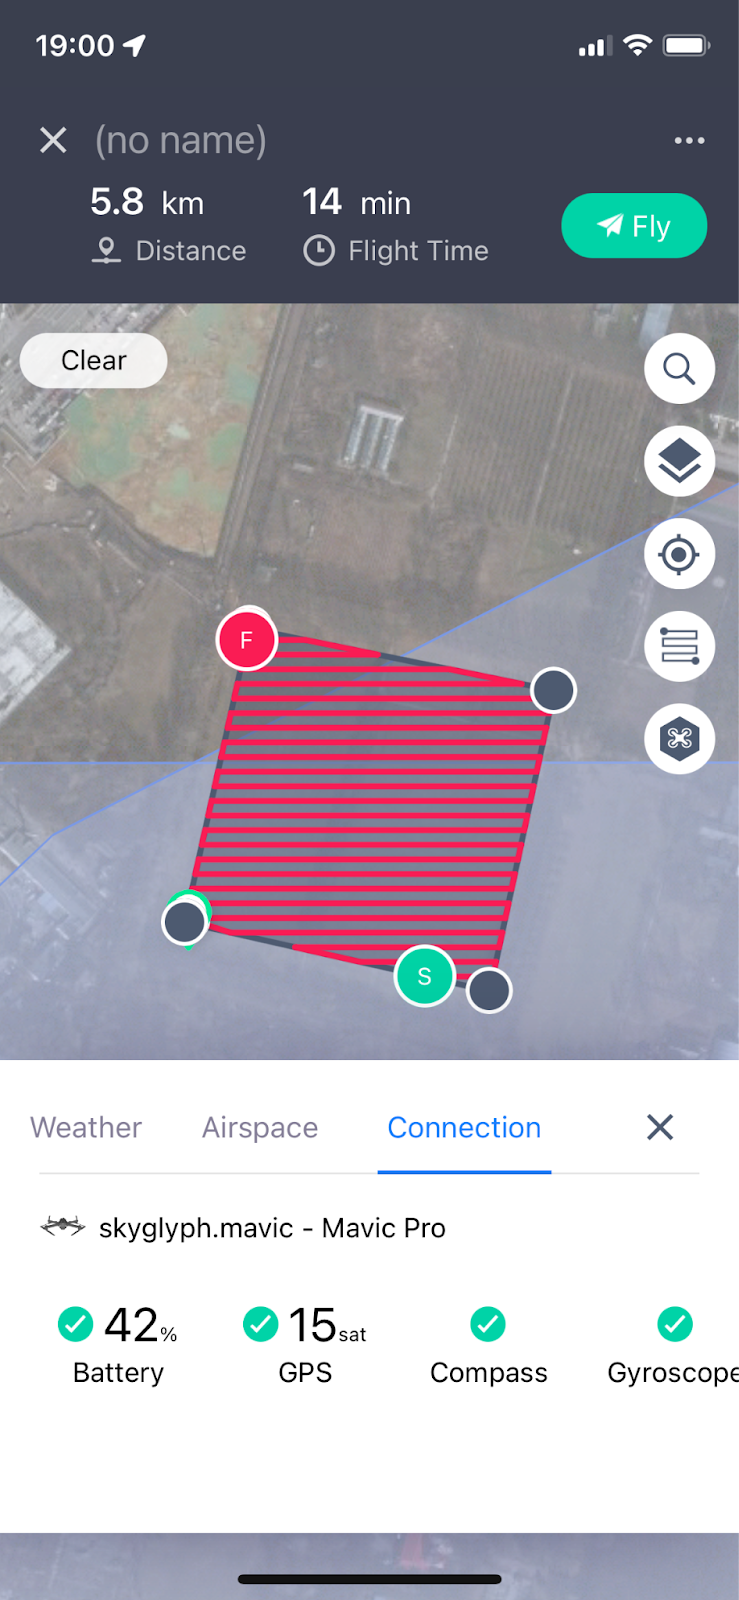
- Connect iOS / Android device with the Drone via cable. Environment widget will provide connectivity details and will display the status of drone connection (e.g. battery, gps count, etc.)
- Click the “Fly” button to upload the mission and click “Start” to confirm that you are ready to start the automated operation.
- The execution of the automated mission will be initiated. The App will transition to the FlightDeck screen and display the status of the Operation execution and other controls.
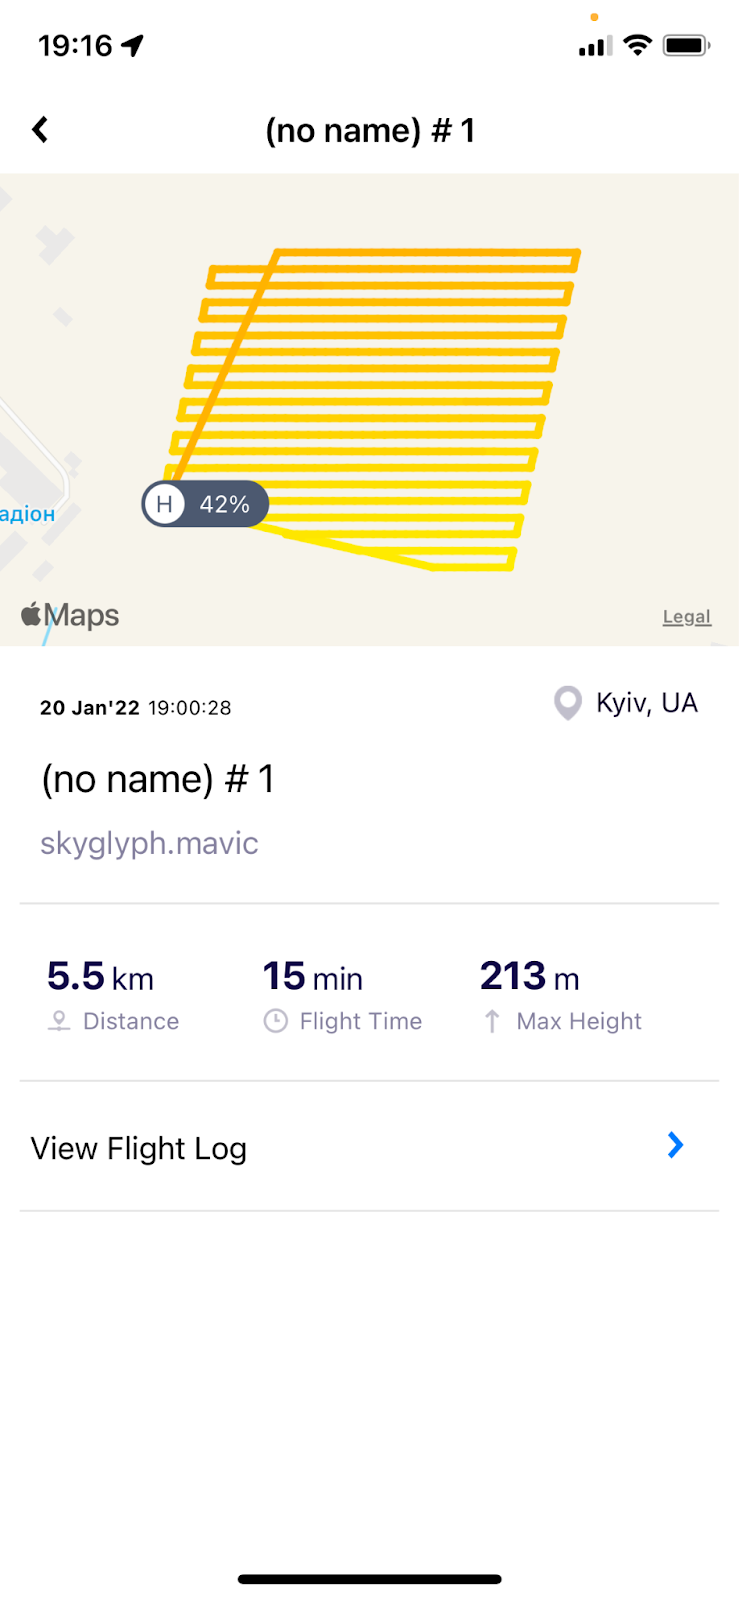
- Once the Operation is completed, the logs and other Operation details will be available for review via the main menu “Flight Plans” under “Activity” tab.